The Myth of the Perfect Practice Space
A focused practice space depends on how its tools, light, and surfaces are arranged. Set up an ordinary room to support the task without a makeover.
A focused practice space is shaped by where the tools, light, and working surfaces sit, not by whether the room looks like a studio. For practice space setup, the useful question is how the arrangement supports the next physical action: seeing a pencil line, reaching a mixing bowl, or moving through a dance sequence without hitting a chair.
That makes the environment more than a backdrop. A tool stored across the room adds a pause; a lamp aimed at glossy paper can hide the very marks you are trying to see. A room can be perfectly tidy and still be arranged badly for the task at hand.
Arrange the space around the task’s working path
Before moving anything, describe the sequence of actions in the practice task. For sketching, that might mean looking at a reference, making a mark, and reaching for an eraser. For cooking, it might mean chopping, transferring ingredients, and using the stove. The arrangement should make those actions straightforward without making unrelated parts of the room the project.
Notice the route between materials and the work surface. Keep frequently used tools within comfortable reach, put secondary supplies nearby but out of the active area, and leave enough clear space for the work itself. The aim is not to have every object at arm’s length; that would turn a useful desk into a small warehouse.
Lighting and viewing angles deserve the same attention as storage. A desk lamp may help with fine drawing, while its reflection on a glossy page can make details harder to see. Adjust the page, lamp, or seat so the surface is legible from the position you will actually use.
Give each object a useful place
Separate materials by how often they are needed during the task. Keep the tools used repeatedly close to the work surface; place occasional supplies in a drawer, bin, or nearby shelf. This reduces reaching and searching without requiring a new set of organizers.
Make the working surface match the activity. A cutting board belongs on a stable, clear area; a music stand needs a readable angle; a sewing project needs space for fabric to extend without catching on nearby objects. Use the materials and furniture already available when they fit the job.
For equipment with specific setup or handling requirements, follow its manufacturer instructions and relevant safety guidance. A convenient arrangement is not useful if it makes a blade, hot surface, cable, or moving part harder to use safely.
Use a simple setup check before practice
Check the environment through the actions the task requires, rather than judging it by appearance. Each observation should lead to a decision; if the condition is acceptable, leave it alone, and if not, make the smallest change that addresses it.
- Observe whether the main tool is within comfortable reach; if it is, keep its place, but if not, move it closer or choose a safer storage spot.
- Observe whether the work surface has room for the active materials; if it does, begin, but if not, clear only the space the task needs or use another suitable surface.
- Observe whether the task is clearly visible from the working position; if it is, keep the light and seat, but if not, reposition the lamp, page, or chair.
- Observe whether cords, bags, or furniture cross the route needed for the task; if they do not, leave the path as it is, but if they do, move the obstruction or choose a clear route.
- Observe whether frequently used supplies can be reached without leaving the work; if they can, keep them nearby, but if not, group them in a tray or place them beside the work area.
- Observe whether the setup follows the equipment’s handling instructions; if it does, proceed, but if it does not, reset the equipment according to its instructions or choose a safer alternative.
Work through one complete setup decision
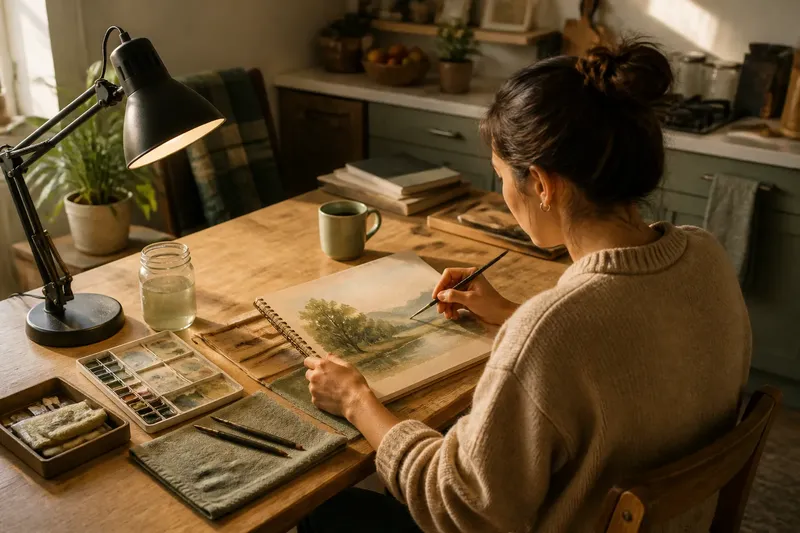
Imagine Maya plans to practice watercolor at a kitchen table. Her starting point is a sketchbook, a water cup, two brushes, and a lamp positioned behind her right shoulder; she notices that her hand casts a shadow over the area where she is painting. She moves the lamp to the left side of the table and turns the paper slightly, then checks the work from her seated position. The painted area is now visible without her hand covering it, so she keeps the new arrangement and starts; if the shadow had remained, she would have tried a different lamp angle rather than buying supplies or rearranging the whole room.
This kind of decision is specific to the actual surface and task. A lamp position that works for watercolor may be unhelpful for reading sheet music, just as a clear floor matters for movement practice but not for a small drawing.
Make temporary arrangements easy to restore
Some activities share a room with ordinary household work. A shallow tray can hold drawing pencils between sessions; a folding music stand can be put away after practice; a clear patch of floor can be restored by moving a chair to its usual place. The arrangement should be easy to set up and remove, not a claim on the room forever.
Think of a temporary setup like a place setting: each item has a clear position while the activity is underway, then the table can return to its other use. If the arrangement takes more effort to maintain than the activity itself, simplify it or choose a more convenient surface.
When should you change the arrangement?
Where should tools go during practice?
Put the tools used repeatedly within comfortable reach and keep occasional supplies close enough to retrieve without crowding the work surface. If reaching for a tool interrupts the task or creates an awkward movement, change its position or use a different storage spot.
How can I reduce glare on a work surface?
Change the angle of the lamp, page, or seat and check visibility from the position you will use. If glare remains, try another available light source or surface rather than assuming the room needs a major rearrangement.
Can one room work for several hobbies?
Yes, if the arrangement can shift to suit each task and the shared space remains safe and usable. Store materials by activity and bring out only what the current task needs, instead of asking one permanent layout to suit every kind of practice.
What if the room is shared with other people?
Choose a setup that can be cleared or moved without blocking common routes or taking over shared surfaces. If a task needs uninterrupted access to equipment or materials, agree on a suitable time and place with the people who use the room.
Let the setup support the next action
Practice space setup is useful when it makes the task easier to see, reach, and carry out safely. It does not need to solve every possible interruption or turn an ordinary room into a dedicated studio.
When an arrangement feels awkward, identify the physical point of friction: a tool is out of reach, a surface is crowded, or the light falls in the wrong place. Change that part, check the task from the position you will use, and leave the rest of the room alone unless it has a reason to join the discussion.